
Table of Contents
We love to take pictures on every occasion, and the iPhone is the best choice to capture the images as it comes with the best camera quality. But, we have reached the point where our iPhones are running out of space, so we need to transfer our images. As we know, iCloud only gives its users a maximum of 5GB of storage for free. So, in this article, we will learn how to transfer photos from an iPhone to another iPhone in various ways.
Moreover, images hold emotional value, so we always ensure they are not lost during the transferring process. But here, we can discuss the easiest ways to transport the images, whether you are changing your iPhone or transferring your photos.
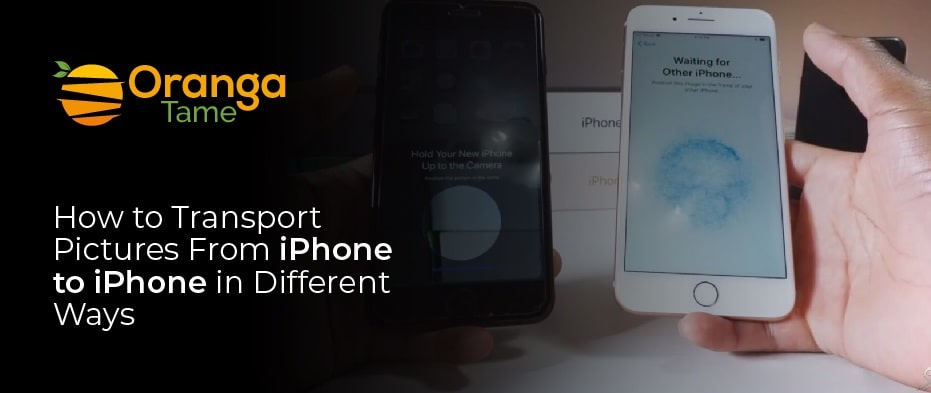
How to Transport Pictures From iPhone to iPhone in Different Ways
Here we will explain the methods, so you have to try the most suitable way and Select the one that fits your particular needs best to apply.
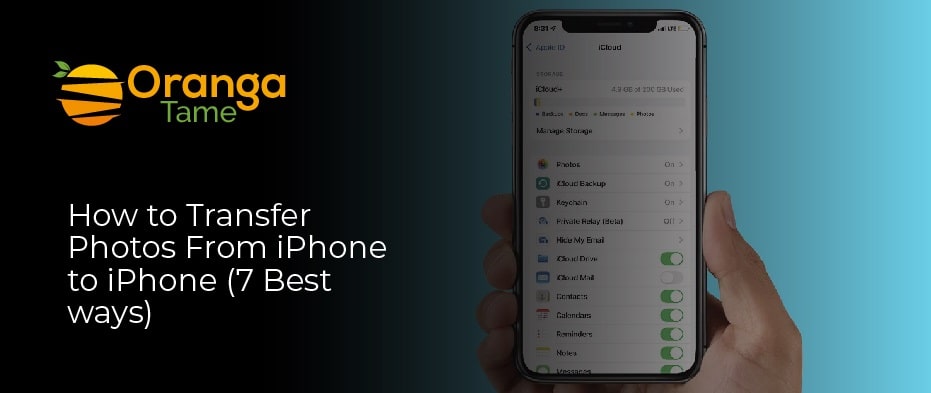
1. Transfer Your Photos From Old iPhone to iPhone by Using iCloud
If both of your iPhones use the same Apple ID and want to move all photos from your iPhone to the new iPhone, perhaps the best way is via iCloud. By allowing iCloud images on both iPhones, You can now sync your photos across multiple devices. To move images, you have to follow the steps.
- Ensure that your old and new iPhones use the same ID.
- Then, you have to switch on iCloud photos on both iOS devices by opening the “Settings” [name] and then going to “iCloud Photos.”
- After that, your old phone images will be synced to the targeted iPhone automatically through a WIFI connection.
Note that, despite iCloud Photos, if you want to shift everything from the old iPhone to the new one, you must use iCloud Backup. It can store almost all of your data on iCloud. Ensure that you have enough space in your iCloud to store all the data. After that, you will be able to restore a new iPhone.
2. Move Photos from iPhone to iPhone by Using iTunes
We can also transfer photos using iTunes, but it is not a simple process. To share images with iTunes, you first have to transfer all the photos from the source iPhone to a PC and then sync them from the PC to the new iPhone via iTunes. Below are some steps to move images from the iPhone to the PC.
- First, you have to unlock the source iPhone and attach it to the PC. Then select “allow” on your iPhone.
- Next, you have to select what to do with the device on your Windows PC. Then, you have to opt for “Import pictures & videos” and tap “Review, organize, and group items to import,” or you can wish “Import all new items” to carry on. After that, choose the photos you want to import to the PC or wait for Windows to shift the photos from the iPhone to the computer. It should be noted that this will allow you to transfer photos from your camera roll. If you want to select all the pictures, it will go through another method.
To move images from computer to iPhone via iTunes
- Ensure that you have downloaded the latest version of iTunes and then connect the target iPhone to a PC and tap “allow” on the device.
- So, select the device button in iTunes and open “Photos.”
- Ensure the “Sync Photos” option is enabled and choose the pictures you would transfer from the PC.
- Then, tap “Apply” to initiate moving images onto the new iPhone.
3. Transfer Your Photos with EaseUS MobiMover
With the MobiMover tool, you can quickly transfer your images from iPhone to iPhone. Using the tool, you will be able to transfer all of your albums from one iPhone to another or copy some of the files regardless of the Apple ID you use. It is also useful if you attempt to move images from the iPhone to other devices. Here are the steps you should follow to transfer the photos without using iCloud.
- First, attach both your iPhones to your computer and run EaseUS MobiMover. Then opt for “phone to phone.” After that, set your old phone as the source device and the new one as the target device, and then hit the “Next” button to continue.
- After that, make sure you have the files you would like to copy. Other than photos, you can also select to move music, videos, images, contacts, and more from your phone to the new targeted form.
- Select the “Transfer” button to begin importing photos from your iPhone to your iPhone. The time will depend on the images’ size, so you have to wait for the procedure to be completed. Next, you have to open the “Photos” app on your targeted iPhone and ensure the newly copied photos are there.
It is significant to mention that the EaseUS MobiMover can also work as a video downloader that lets you install videos from websites such as Vimeo, Youtube, and more to your computer (Mac or PC) and iOS.
4. Transfer Your Images From iPhone to iPhone Via AirDrop
If you want to move your photos from iPhone to iPhone wirelessly, another method is to do it by using AirDrop. Airdrop allows you to drive photos selectively, unlike iCloud photos, which will sync all iPhone images.
- First, ensure that the two iPhones are within Bluetooth and wifi range.
- Then, allow wifi and Bluetooth and check that the personal hotspot is off on the iPhone. Next, toggle on AirDrop and accordingly set to move files to “Contacts Only” or “Everyone.”
- After that, open the “Photos” app, choose the items you want to share, and click on the “share” option.
- Next, tap on “AirDrop” and choose the targeted device.
- Then, tap “Accept” to receive the photos on the targeted iPhone.
The iCloud and AirDrop wireless solutions usually transfer photos files from iPhone to iPhone over wifi. It means that if you have huge files to transfer, it will take some time, so you have to wait for the procedure to complete.
5. Move Your Photos From iPhone to iPhone through Cloud Storage
Cloud storage services like Dropbox are also helpful in syncing the images from one iOS device to another, similar to iCloud.
- First, install the apps on both of your iPhones.
- Then, you have to log in to the app with the same ID.
- Next, you have to upload images to Dropbox from the iPhone you want to move from, and then the pictures will be synced to the other device over a wifi connection.
6. Transfer Photos from iPhone to iPhone through Email
If you are going to move several photos, then why not try Email? Here are steps that help you understand how to do it. You can select the images you want to transfer as email attachments, send the Email from the source, and then make sure the Email on the targeted iPhone receives and then downloads the images to the device. After that, you will be able to open the photos app to see the images.
- First, go to the mail app on your iPhone and choose the “Create” icon on the right side of the screen.
- Then, enter your Email in the field and add a subject. Then, select the photos.
- After that, tap on the images you want to send.
- Next, click on the “Send” icon.
7. Move your Photos through Finder
If you own a Mac with macOS Catalina or MacOS Big Sur, You can easily share pictures from the source phone to your Mac and then transfer them to your phone by using the finder app on a Mac computer. Another method to transfer the images and other files is with just a simple backup and restore.
- Plug your iPhone into a Mac or Macbook with its cable.
- Then, go to the Finder by clicking on the hard drive icon and choosing your device from the menu under the locations. You have to trust both of your devices and select them.
- Next, select Back up all of the data on your phone to the Mac and click on Back up Now.
- Once it’s done, unplug the source iPhone and attach the new iPhone. Then, select Restore Backup.
Conclusion
We have covered everything for you. We have explained to you the easiest method to transfer your photos from an old iPhone to a new iPhone. Now, you do not have to delete your pictures even if you get a new phone. The above methods help you transfer images from your iPhone to your iPhone, So it’s up to you to make a better decision. I hope you understand all the methods. Let us comment on your convenient way.